![]()
CephaloMetrics AtoZ Characteristics


Importing Images
How to import x-ray images
1. Import from x-ray films through EPSON scanner with transparency unit for film scanning.
2. Import from Imaging Plate. (JPEG, DICOM, TIFF, and BMP are available.)
3. Import image files from CCD digital x-ray. Import image data exported with x-ray devices of each manufacture. Besides JPEG, DICOM, TIFF, and BMP have been added as image format.
4. Import tracing written with WACOM tablet.
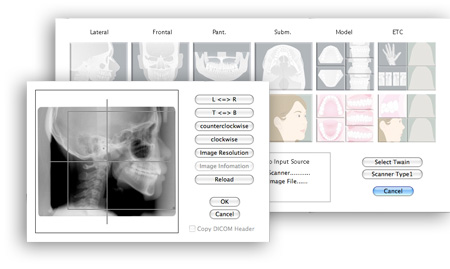
Image Plate
Take the image with image plate instead of x-ray film on x-ray devices you have used in your clinic, and then import it as digital data with a special scanner. Save a file in JPEG and DICOM image format, and import it into AtoZ.
CCD Digital X-ray
AtoZ is available to import x-ray images taken with CCD digital x-ray devices made by any manufactures.
Import DICOM Files
DICOM (Digital Imaging and Communications in Medicine) is a standard for digital medical images and network communication protocol. A DICOM format includes patient information such as name, date of birth, and sex, and AtoZ can load these information as needed.
Import Color Photo
AtoZ can import high resolution slide with a scanner with transparency in EPSON, and also import images taken in digital camera easily. High resolution images in image processing software such as Photoshop can be copied temporally and be pasted on AtoZ. Images can be edited by a trimming frame, and right/left inversion, horizontal/vertical inversion, or clockwise/counterclockwise rotation are available.
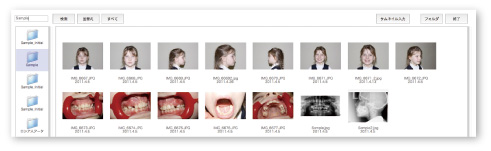
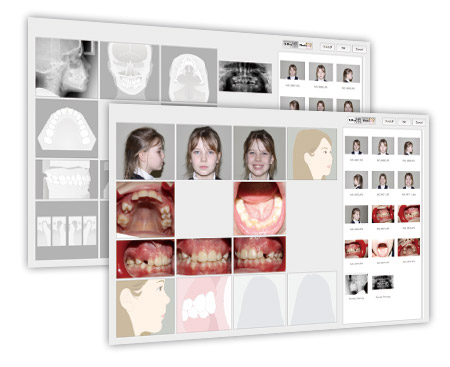
Thumbnail Input
JPEG images taken with digital camera can be imported by dragging and dropping with checking images in thumbnail view. If x-ray images are saved as JPEG files, they are used as well.
After choosing image folder, drag and drop image files from the right image list to the left place corresponding to an image. The image becomes translucent when moving it to know what image is selected.
Explain to Patients
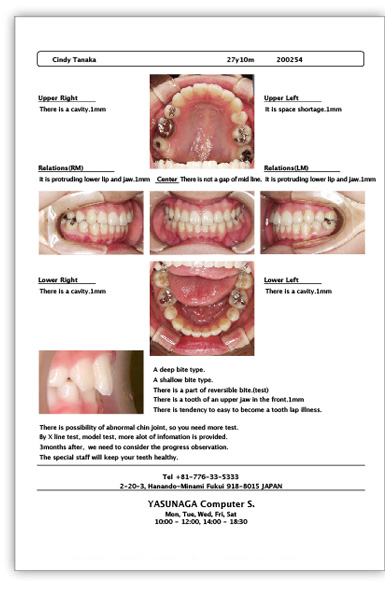
Informed consent documents
For orthodontic consultation, make an informed consent document easily through only taking intraoral images without x-ray. Import intraoral images and print it out, and then use for explanation to a patient to give the document and get access to the start of treatment.
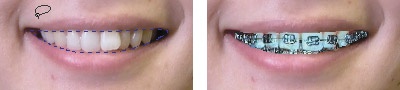
"Smile" Function
Using the lasso tool, it is available to simulate the patient smile with brackets before treatment and create the image how the patient will change. In addition, you can explain the difference between metal brackets and ceramic brackets in anterior teeth before starting treatment.
Input Straight Line and Angle
You can write straight lines and angles in the images. You can explain patient writing additional lines and angles on tracing images after analysis. This function is more effective to make it clear for measurement and presentation.
Point Input
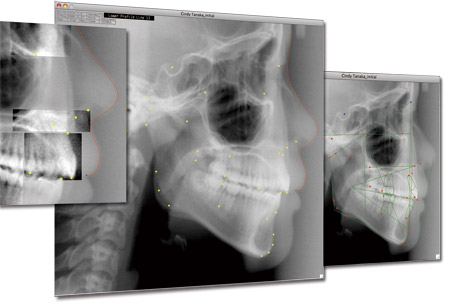
Image enhancement
X-ray image can be more clear with image processing. Before inputting point, teeth root and the part of unclear soft-tissue line are enclosed with a frame tool, and then the image is enhanced partly.
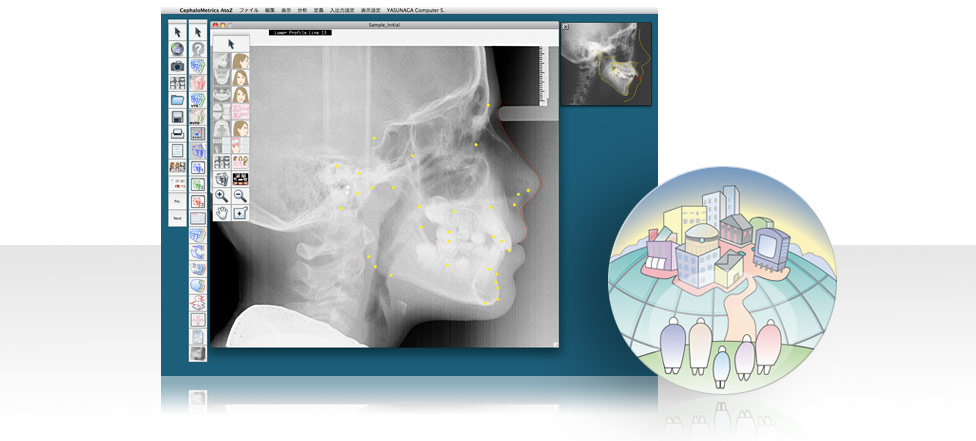
Input Analysis Point
Image processing makes the x-ray image clear and you can plot points directly on the computer screen.
Point input is conducted listening computer voice and confirming the position of points with a guidance window. In lateral analysis, 32 points and 4 lines should be inputted.You can choose to use or not 32th point, which is PAC.
Template Input
Not only conventional point input, template input is available. Input 3 points: Porion, Orbitale, and Gnathion, or 2 points: Sella and Nasion, and then all points and tracing are displayed. Input each point drag with mouse. After inputting points, start line input.

Analysis
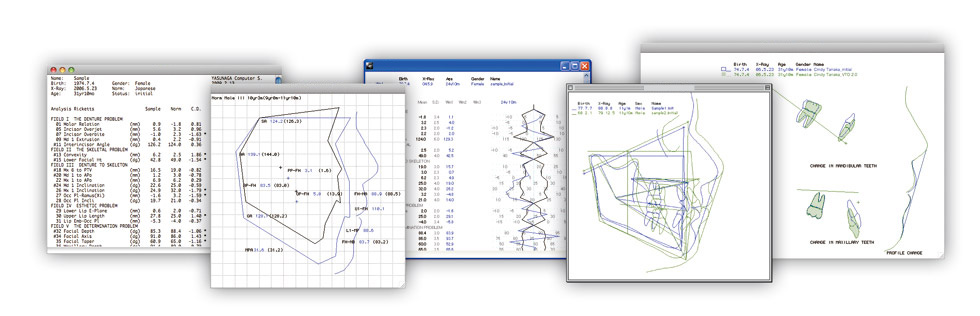
Analysis
Lateral analysis is set by default, but there are up to 16 other models such as Ricketts, Steiner, McNamara, Downs&Kim, Jarabak, angle analysis, distance analysis, soft tissue analysis, Bimler analysis, Tweed, Roth etc that can be applied. The image can be rotated in right/left for Bimler analysis. Original analysis can be defined.
There are Rickets analysis and symmetry analysis in frontal analysis. In addition, Submento vertex analysis is supported.
User Analysis Definition
Up to 60 points can be defined as additional definition in both lateral analysis and frontal analysis. 60 items of measurement item, standard value, standard deviation, and lines can be used freely as user definition.
Display Measurement Value
The display of standard value can be changed. All contents on the screen can be displayed in the analysis.
Facial Diagram
Superimpose the standard values and SN-FH plane, and display soft-tissue on facial diagram.
The standard value can be changed according to the method of the university. Measurements in angle are also displayed.
Polygon
Display polygon of analysis result. Choose the standard value for each stage in Downs-North Western analysis and Liner analysis to display polygon.
Superimpose
In superimposition mode, you can select the position of superimposition such as SN@S and FH@S, and the position is changed immediately. Drag the image with mouse to rotate and move the superimposed image freely.
Orthodontic and Oral Surgery Simulation
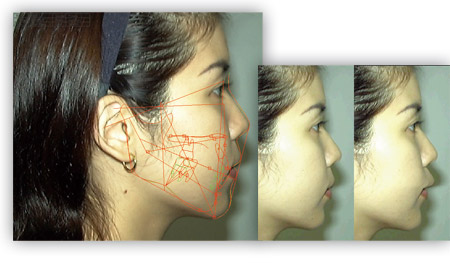
Orthodontic and Oral Surgery Simulation
Orthodontic and oral surgery simulation are available in lateral and frontal. Using oral surgery simulation on lateral, you can make four places of lower jawbone and one place of upper jawbone cut. In addition, enter numeric value for treatment simulation on a treatment dialog. User definition is available for the movement of soft-tissue in orthodontic treatment simulation. Morphing of color photo provides smooth image simulation by sophisticated mapping technique.
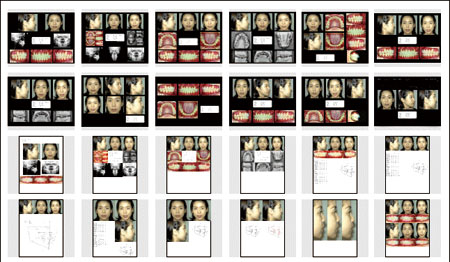
A Variety of View Format
According to a variety of view format, you can provide a presentation of similar cases at initial consultation and print out image files in before-and-after treatment. Display the comparison of before-and-after simulation.
Select a format in a view palette. As well as other applications, copy and paste text and image in Edit menu. (Install enough memories on the computer.)
Easy data sharing
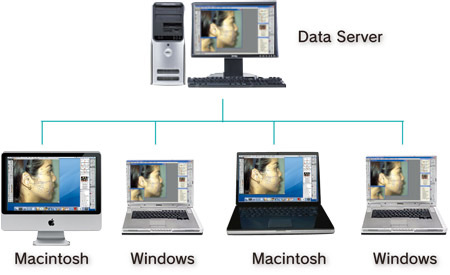
Use AtoZ on Local Network
Save the patient data on the server, and access the data to read and write from each client. Save the data on the specified folder. Register the saving folder by default.
Use AtoZ Data on Both Macintosh and Windows
Share all AtoZ patient data created on Windows and Mac without any data conversion. In local network, even if Mac and Windows are mixed, the AtoZ data can be used.
How to Use AtoZ Database
AtoZ image data and patient data file on the server can be displayed immediately. Search and display the patient data by specifying name and patient number. Define three types of arrangement of images. AtoZ is in the least inferior to other database software in displaying speed.
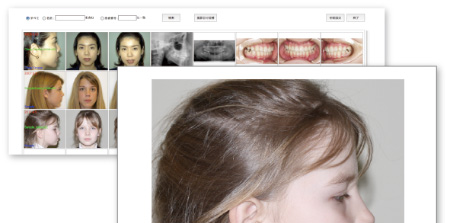
Image browser
JPEG, DICOM, and TIFF image format is available for browsing. On the left side, patient folders are displayed while the patient data in the folder is displayed on the right side. Double-click image to enlarge it.
Enter patient name of the folder in search box on the top right for narrowing retrieval. It also sorts folders by created data.